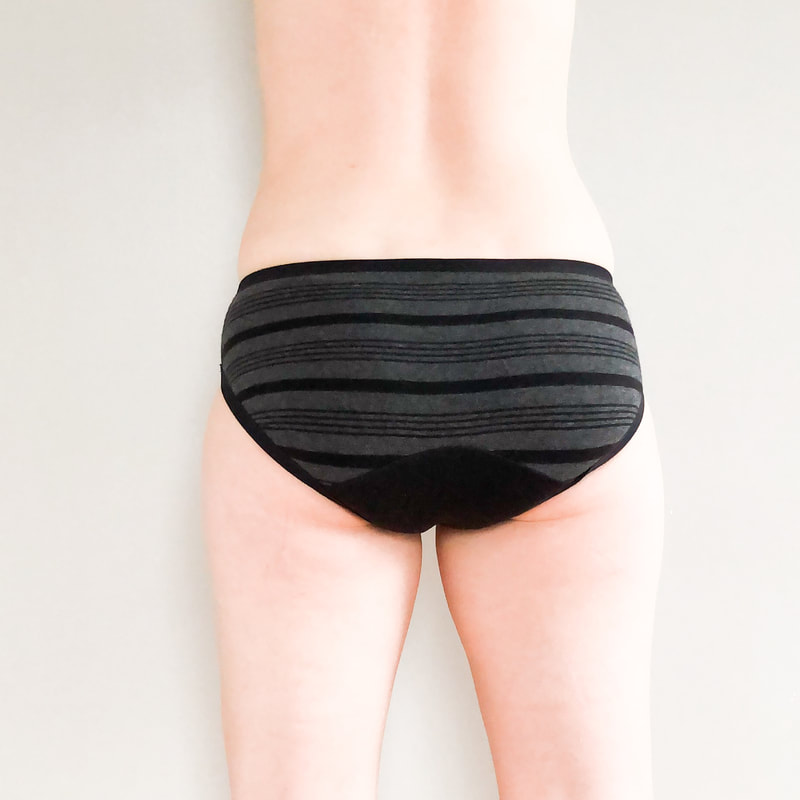
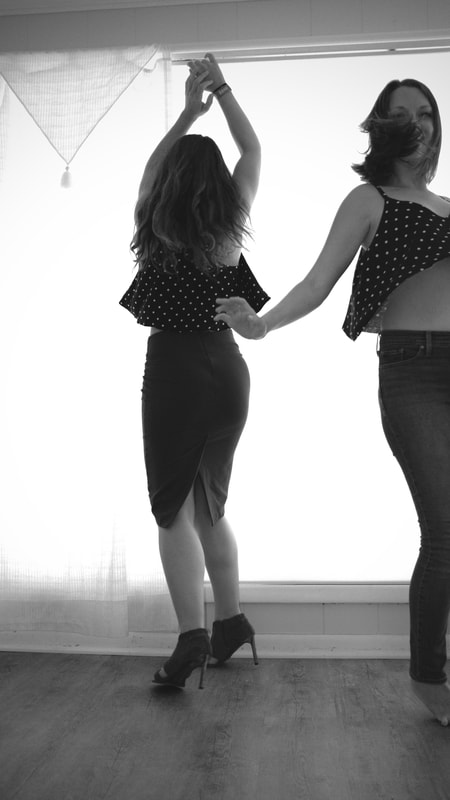
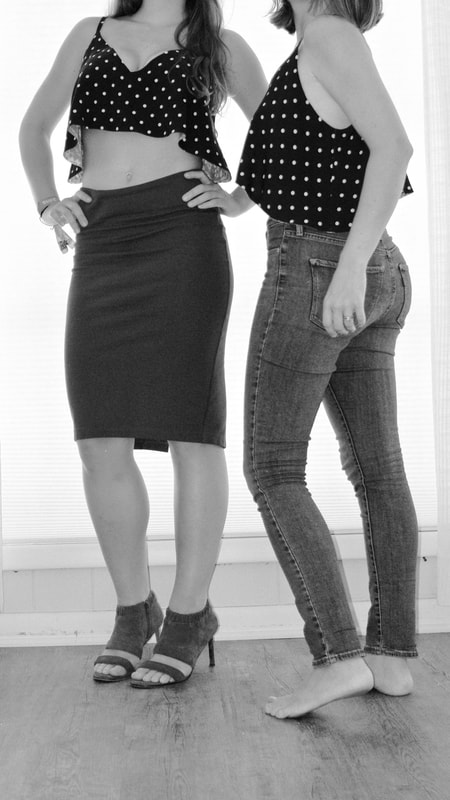
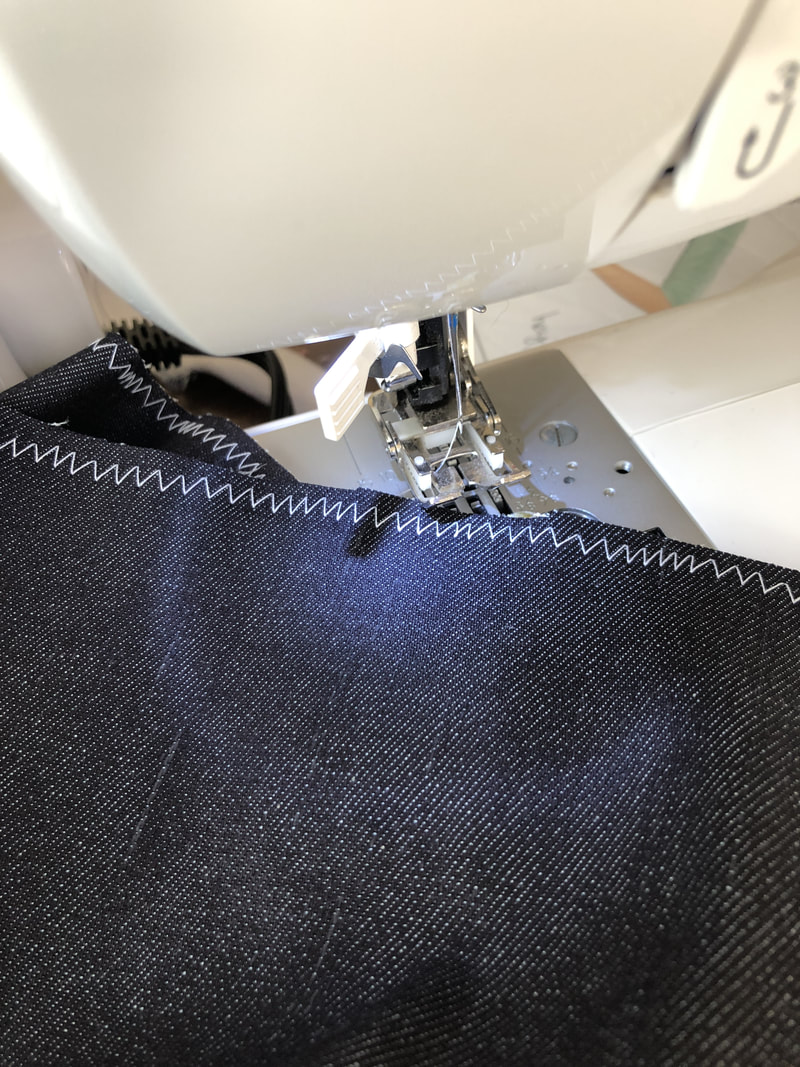
Before we get down to the topic du jour, I'd like to point out that I cannot believe my last post was in November of 2018. That's right, over a year ago. I had a goal for myself to post once a month last year. I'm not entirely sure what happened to that goal or how it slipped away so unnoticed, but I do truly hope to change that this year. I suppose part of it is that life is busy and unpredictable. We all know that. Another part of it is that I have a great deal of trouble making myself sit in front of a computer screen and focus. It is one of the worst parts of my job as a Registered Nurse (something I never anticipated being such a large chunk of my job because aren't I supposed to be taking care of people?!). However, I LOVE to write. It is something I used as therapy for many years but that has somehow almost vanished from my life as technology has evolved. I want to rekindle that form of expression. And now that I've shared that bit of intimacy, what better topic is there to blabber on about into the great abyss that is the internet than sewing and my underwear? Might as well dive into the deepest end first--it's been a hot topic since at least 2015 in RTW--PERIOD PANTIES. After the birth of my daughter in 2015, I realized that the products I had used previously were not comfortable for my new body. Let's be honest, they were probably not comfortable for my old body either, but I had no idea of the alternatives out there. Sewing was also still new to me at this time and during my research for new options, I came across many tutorials on how to sew your own reusable pads. This topic was fascinating to me. I began plotting and formulating how to incorporate these techniques right into my own underwear. Wouldn't it make you feel as if you were wearing a diaper though? I dug deeper. It was during this time that I stumbled across the ever-popular ads for a very well known brand of period underwear. I was floored. How amazing was that? In 2017, I gave it a whirl. They were fine for a while, but I felt the company was not very transparent in discussing the materials used in production. Certainly they wanted to keep their technologies proprietary, but I really wanted to understand, in depth, what I was wearing so closely to my body. Fast-forward to 2019. Sophie Hines released a kit that contained all the materials one would need to sew their own period panties. This was a freakin' game changer. She discusses, in depth, on her website ALL of the materials that are included in her kit and you see every single bit of it because, duh, you're sewing them yourself. I ordered one as soon as I found out about their existence. I waited patiently (*ahem* sort of...) for the kit's arrival. I followed the tutorial on Sophie's website to transform any panty pattern into a period panty pattern. They. Were. Glorious. Yes, they were slightly bulkier that the RTW version I had been using, however, this bulk was no more obvious to anyone else in this world that might be staring at my butt than the other undies were AND they worked better.
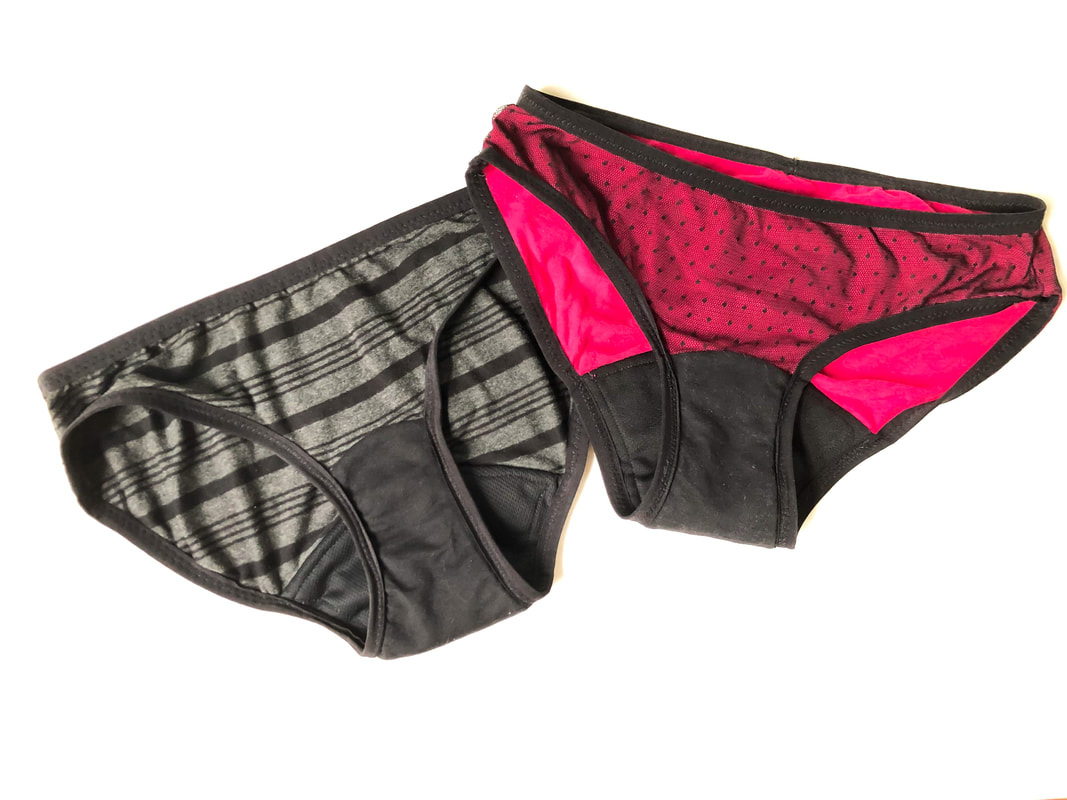
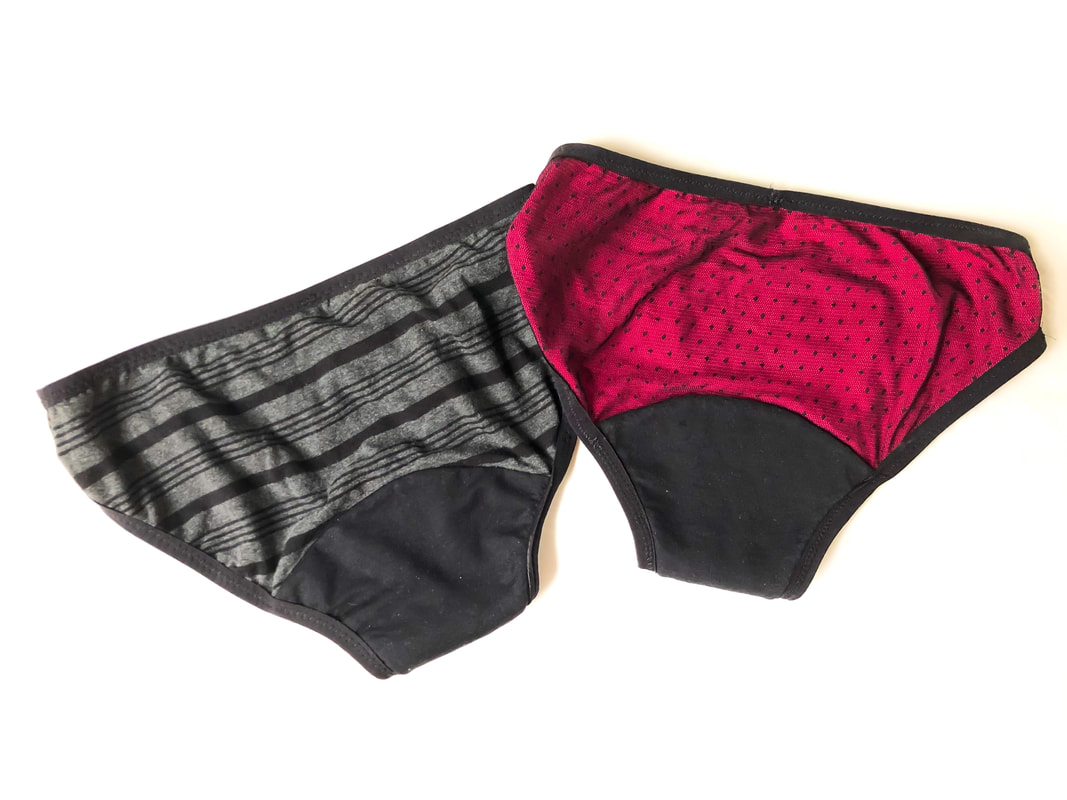
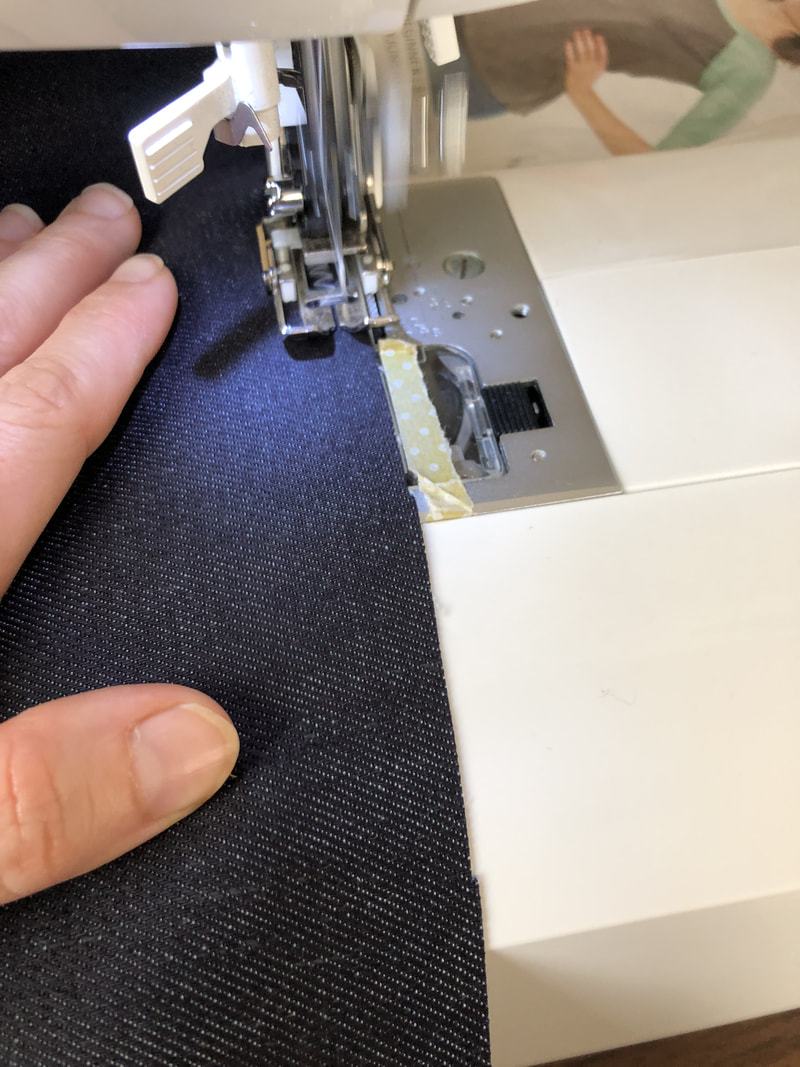
Because you're sewing your own, these are completely customizable. I used the Megan Nielsen Acacia pattern (free if you sign up for her newsletter) for mine because I like the amount of coverage they provide. Prior to construction, I studied my RTW panties to get a feel for how much I needed to change the crotch to accommodate my needs. Knowing what I know now (that these underwear work better than my RTW), I could probably decrease the coverage area in future versions, but this was a great starting point. Sophie's tutorials both for modifying your existing patterns and for actual construction are very detailed and were incredibly easy to follow. Now, for a few pointers. One tip I came across on Instagram (and I can't remember who shared it), was to trim your seam allowances on the bulkier absorbent layer once it is basted in to help prevent catching those extra layers when enclosing everything and to cut down on excess bulk. I did not discover this suggestion until after my first pair was complete, but I did employ it on my second attempt and it made a noticeable difference. Definitely trim your seam allowances (if you're following Sophie's tutorial, it would be just prior to stitching in the crotch). Secondly, basting is very important. You are working with many layers and it is quite necessary to have them all exactly where they are supposed to be if you want any sort of protection from your completed product. Clips are helpful (the type specifically for sewing or binder type clips work equally well--I also have a theory that you could use larger paper clips, but I have yet to try it) in keeping everything where it should be since using pins on the waterproof layer isn't advisable. Thirdly, sew slowly. Making sure that fold over elastic is encasing everything that it should while applying a gentle stretch as directed was the trickiest part for me. Truly, I feel the application of elastic is probably the most time consuming part of the entire project. This is an important step, take your time. Lastly, if these materials enter the dryer, they will shrink. Somehow, during pre-washing, my kit ended up in the dryer (these materials are meant to be air dried). I removed it as soon as I realized it, but the shrink had already taken hold. I was only able to squeeze two pairs of underwear out of my materials. Still quite a deal at their current price point, but definitely a disappointment when you are expecting to make three pairs. Other than the shrinking, the materials held up well to one exposure to dryer heat. The original intent of this post was to cover a variety of DIY lingerie projects, but this topic took hold and wouldn't let go. I'd say I've rambled on long enough for all of us. If you have been wanting to tackle a lingerie project, this is a great one--it's super practical, you get to dip your toes into pattern drafting/modification, it is unique, it is a great step toward adding an environmentally, economically, and health friendly product to your closet, and it is so much fun to customize! This was one of my first projects for the #braaweekchallenge on Instagram hosted by Emerald Erin--hopefully more on that soon. 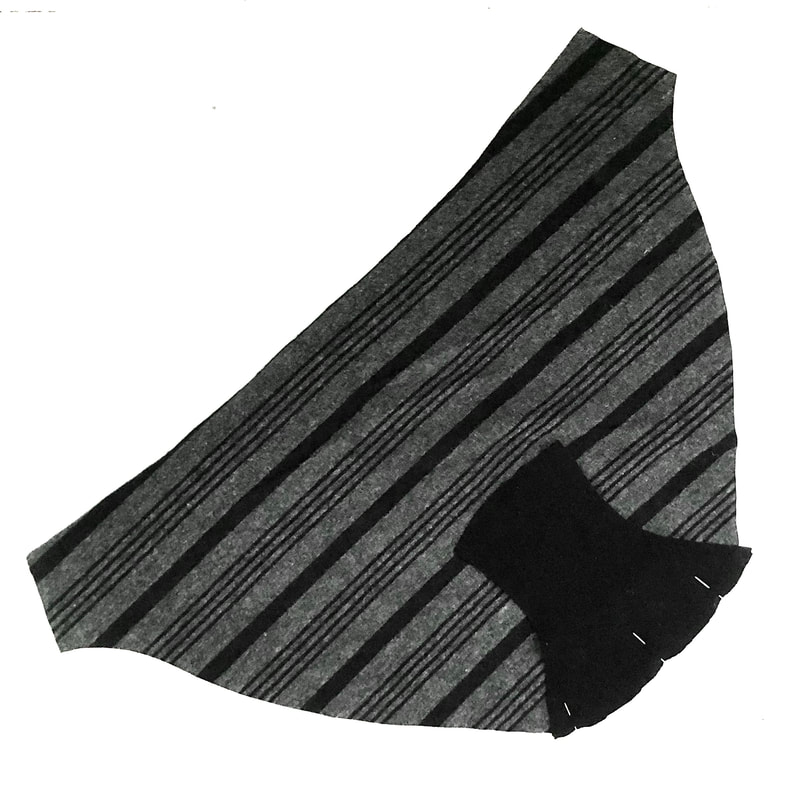
3 Comments
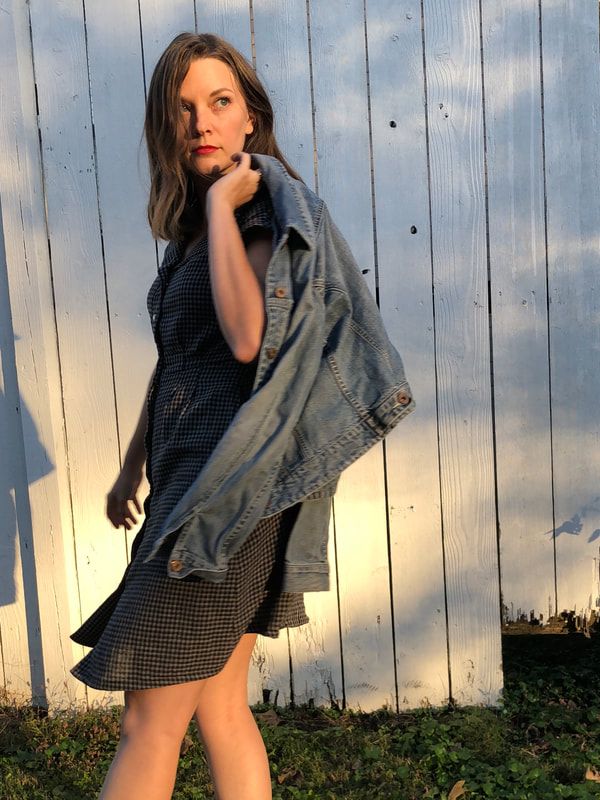
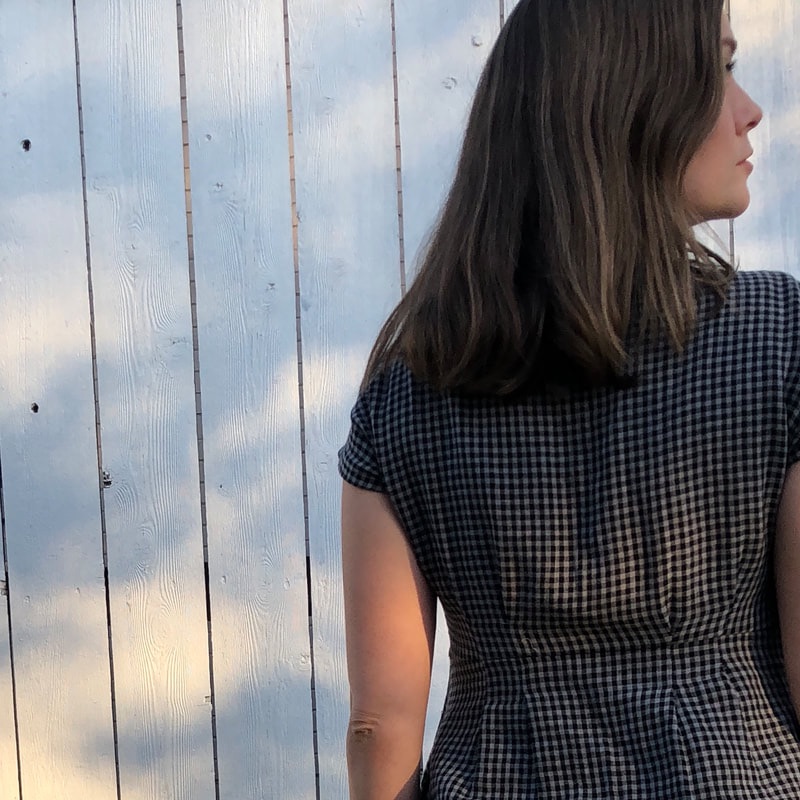
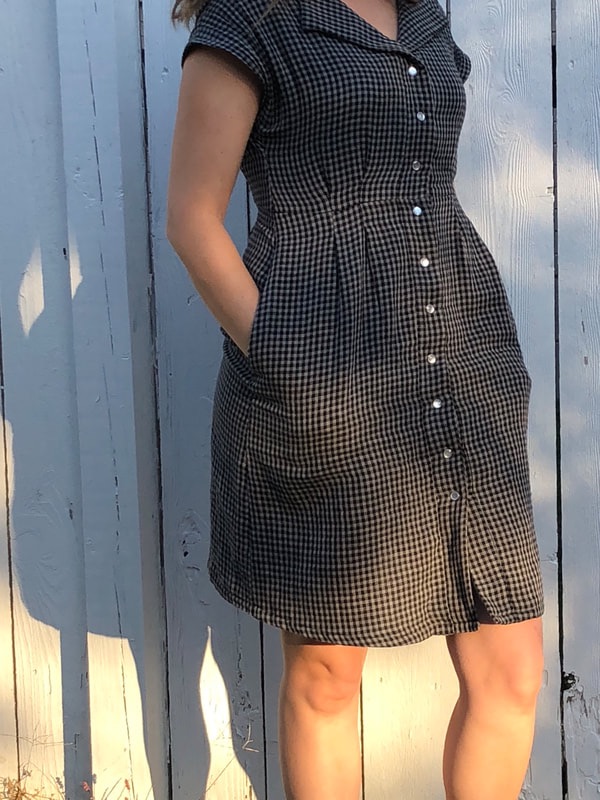
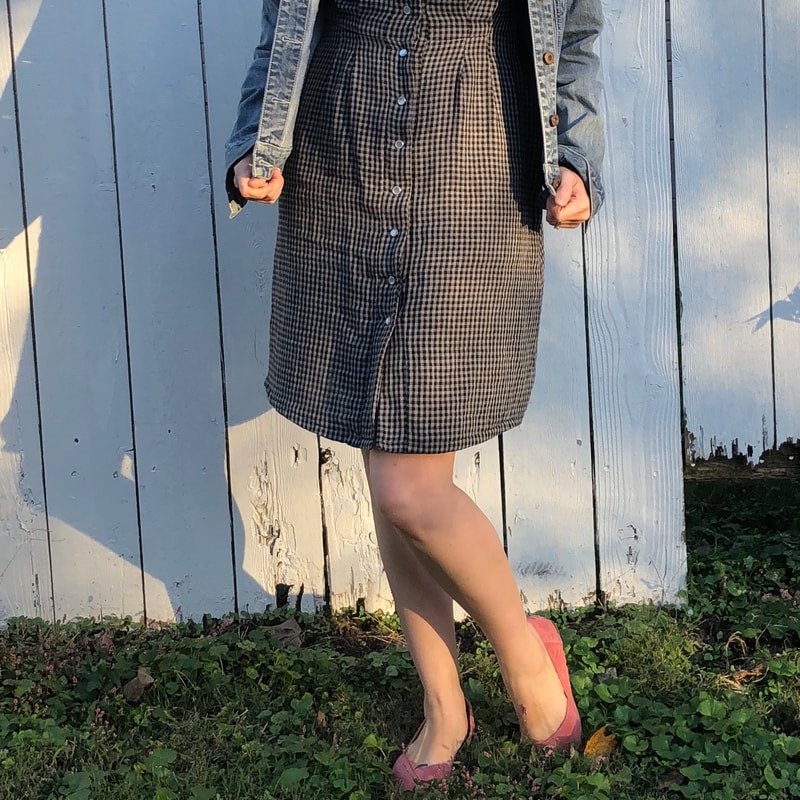
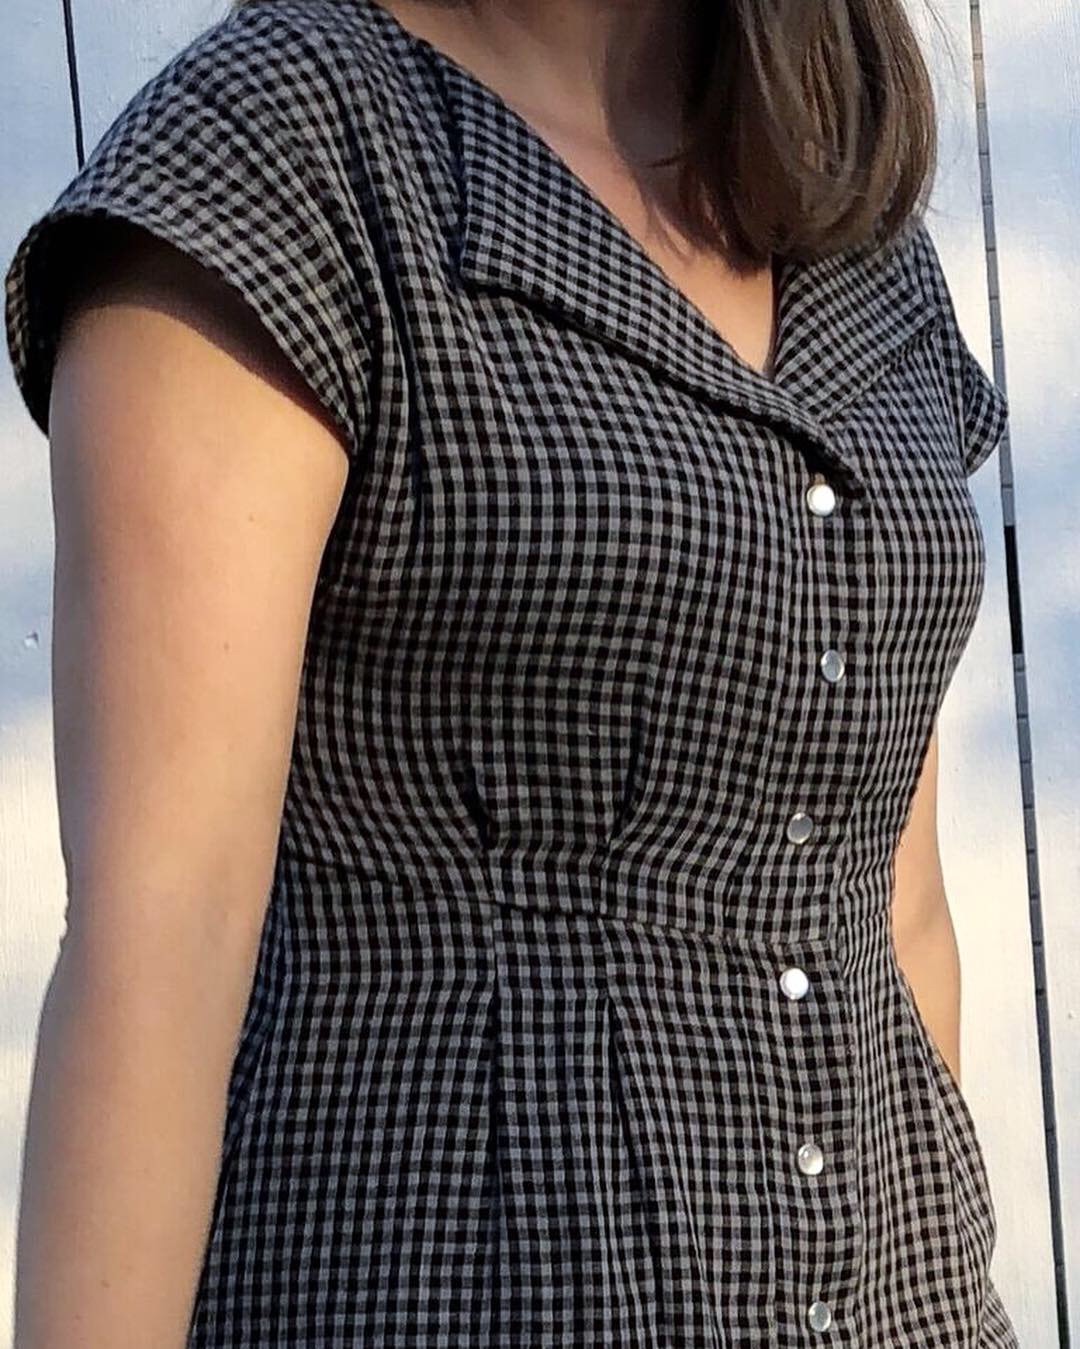
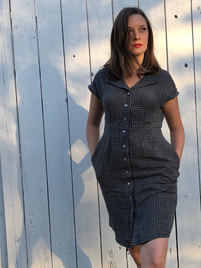
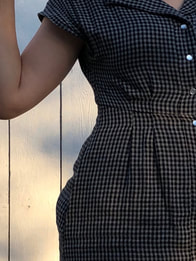
I'm going to ask for forgiveness up front here... I love this dress. And... I had way too much fun shooting photos in it. So... there are a lot. Even for me. A good shirtdress is such a no-fuss garment to rock, that I cannot believe this is only the second one I have made (the first being the Alder Shirtdress by Grainline Studio).
Seriously though, my closet has been whispering to me in my dreams about this dress and Jennifer Lauren Handmade made those dreams a reality with the release of her new pattern, The Sorrel Dress. Jennifer ran a Kickstarter campaign to fund the release of a real life, physical, press-to-hand paper pattern. She smashed her goal in less than 24 hours. Wow. I obviously wasn't the only one in need of the pockets and buttons (or snaps in this case) and sassy-yet-classy ease a dress like this affords. Not only is this particular one infinitely easy to wear, but it is such a great pattern for any skill level to sew (adventurous beginners looking to up your skill game, I'm looking at you).
Not only are the instructions clear, but the illustrations provide extra guidance to those of us more visual learners. As far as construction goes, Jennifer has included pattern pieces for cup sizes A-D (which makes fitting the bodice so much easier), there are no set-in sleeves to contend with, and no collar stand to construct. One of the views even allows you to eliminate the button placket. If you've been wanting to try your hand at making a shirtdress but have felt a little intimidated by the process, there is no excuse not to try this one. The darts are the only part of the construction process that I found slowed things down a bit--it just takes a while to sew 16 darts. HOWEVER, the feminine shaping these darts provide is so worth that extra time. I love to sew, but I'm certainly no fashionista, that being said, I did want to share a few photos that help show some of the versatility of this garment. I sewed this version in a double cloth that I got from Indiesew earlier this year. I feel this fabric can be cool enough to wear in the early summer but also feels just cozy enough (think lightweight flannel) that it translates to fall as well. I definitely have plans for a linen version in the future. This dress is easily worn with or without a jacket, pairs just as easily with boots (excuse my faux pas of brown boots with this gray/black dress) as it does with flats, and accepts leggings without complaint. Hell, you can even take it for a walk in the woods or a ride on a bike if you feel so inclined--click through the slideshow below if you're interested in seeing me attempt to showcase all of that. 
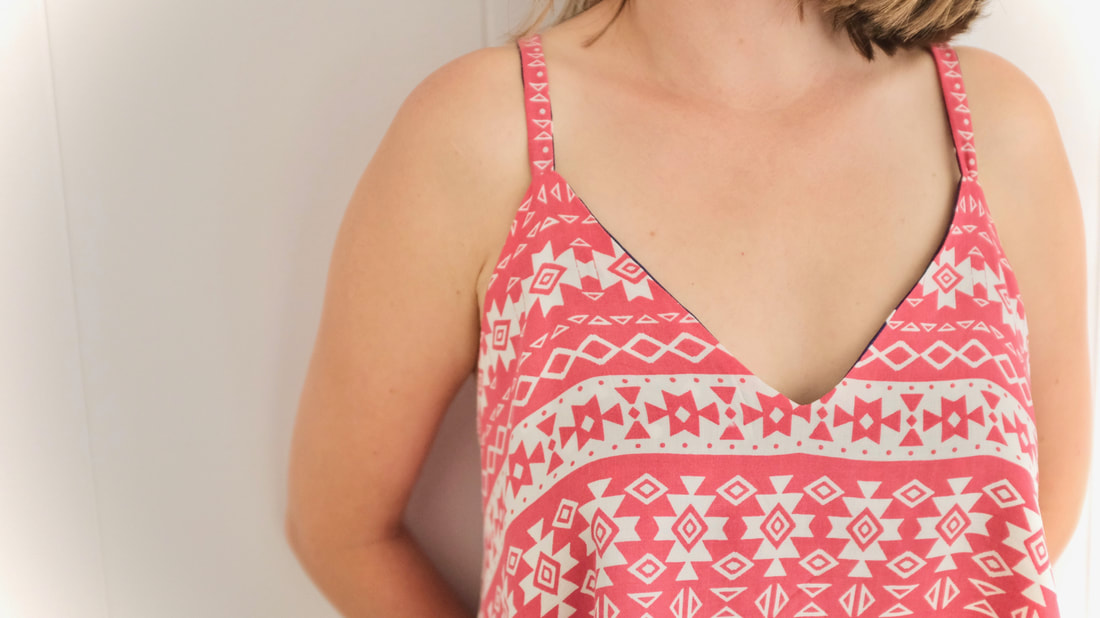
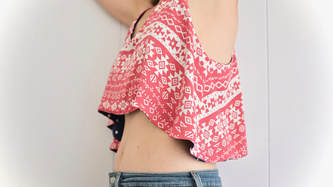
Charleston is hot in the summer. So very hot. But you know what’s hotter than that? Nashville. Yup. Many people don’t believe me when I make this statement. Charlestonians scoffed at me the entire 4 years I lived there when I pointed out the breeze (which apparently blows by unnoticed by the residents of this area) and the fact that at least there was a beach nearby. Even my husband became immune to the tender caress of this wind. Friends that moved to the area at the same time we did also fell victim to loss of perception of this magnificent and refreshing gift. Not I. I will never forget you, breeze!! I will dream of you while biking up sweltering hills and while standing in my yard and while walking sidewalks and streets in the hot, hot, hot, (VERY) humid and breezeless summer that is so characteristic of Nashville. There are many things to love about Nashville, but my family and I decided to make this move during some of the least lovable weather—all that to say, I am soooo thankful to Amy Nicole Studio for this easy, breezy, chic and playful, super versatile pattern release--The Roksi Trio.
The pattern dropped last Monday and is available on Amy’s website. I LOVE this. If you haven’t seen her video yet, check it out—she takes you through all the multiple variations that these pieces encompass and showcases different ways to wear them. I have already ordered some double gauze that I intend on using to sew up all three versions (probably single layer, not reversible) to be worn in various ways, but mostly so that I will have a secret nightgown to wear through multiple seasons.
During the testing process I sewed only the crop version. My reasoning for this was that it used minimal fabric (just 0.75 yds of each main and contrast fabric for a total of 1.5 yds of fabric) and I knew that I would probably have some fit issues due to my narrow shoulders and shorter upper chest area (there’s probably a name for this which hopefully I’ll someday learn). I love the deep V of the neck, but I found the original version to be a little too *ahem* revealing. Some of the testers felt the fit worked really well for larger busts and since I hate to let even my muslins go to waste, I found a busty friend whom has an affinity for showing a bit of skin and gifted it to her in exchange for assistance with the photo shoot. Win-win-win! I made the top again with the modifications Amy made based on tester feedback and it fit much better. I still think I may need a few modifications to make it fit just right—I’d like to find a way to deepen the V a little closer to the original incarnation while keeping some modesty. Amy provided a link to a tutorial that might help with this adjustment from A Jennuine Life that I think I will try. I also may try to lengthen the back of the cropped version slightly because it comes up a tad too short for my liking and I may try to add inseam pockets to the dress version.
I squealed in delight when I realized this garment is meant to be reversible—one of the reasons I began sewing my own garments was because I wanted more items with this type of versatility. With the exception of trimming the hem (which is required after the fabric relaxes a bit) prior to enclosing it, this garment comes together very quickly. If anyone has suggestions about how to complete this trimming without feeling like a twenty-something trying to cut her own bangs (y’all know what I’m talking about—the evening out attempts that result in bangs that are WAY too high), I’d love to hear them! #roskitrio 
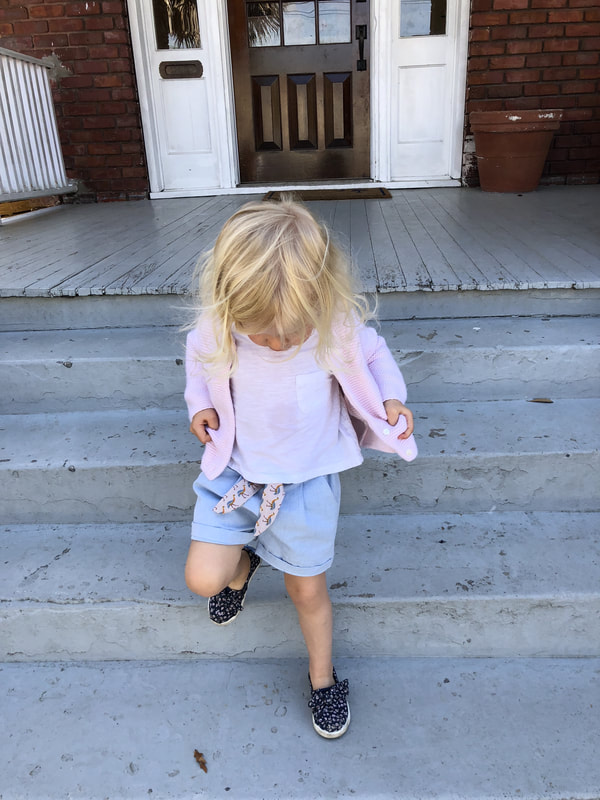
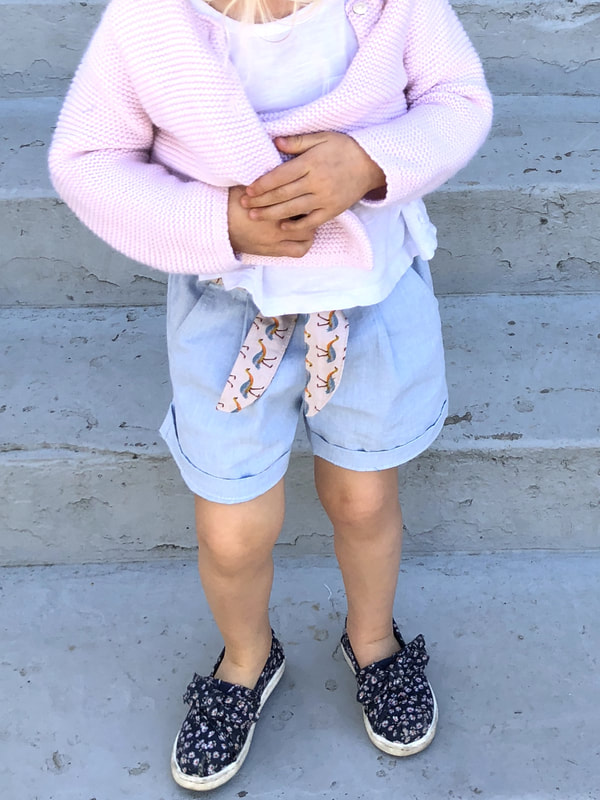
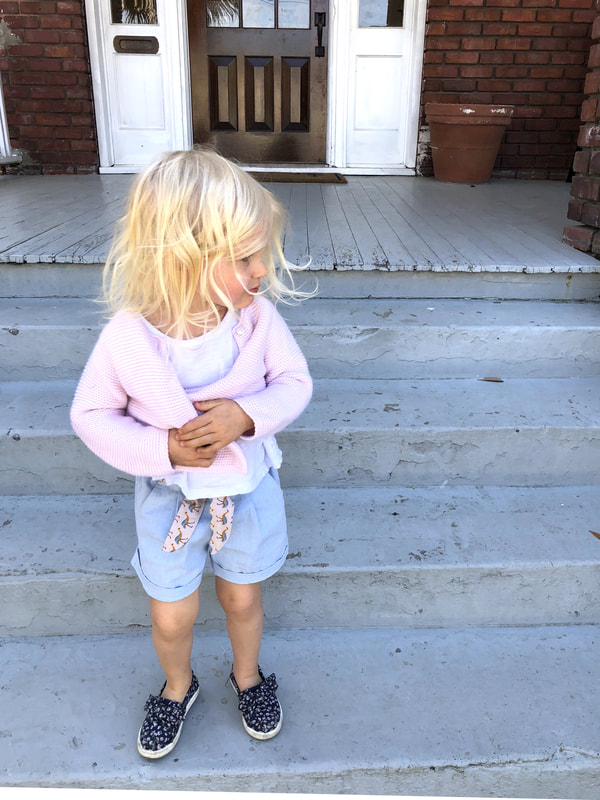
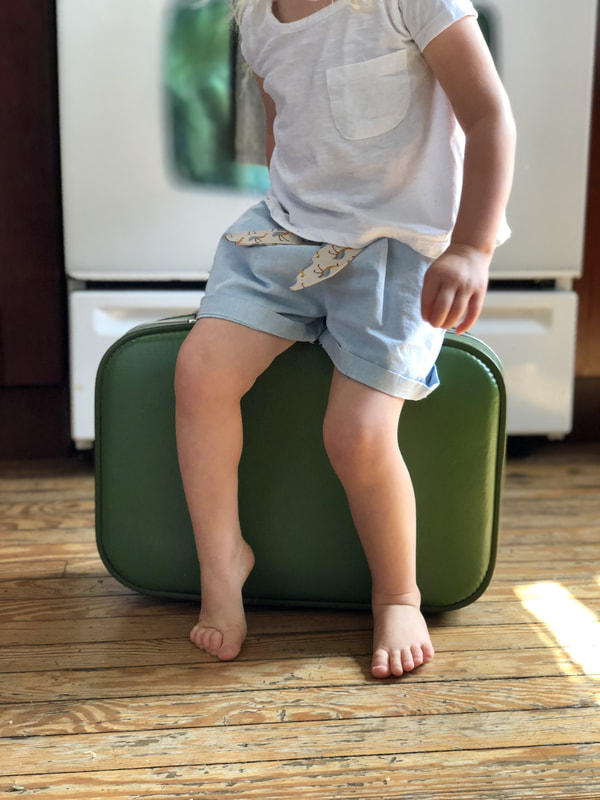
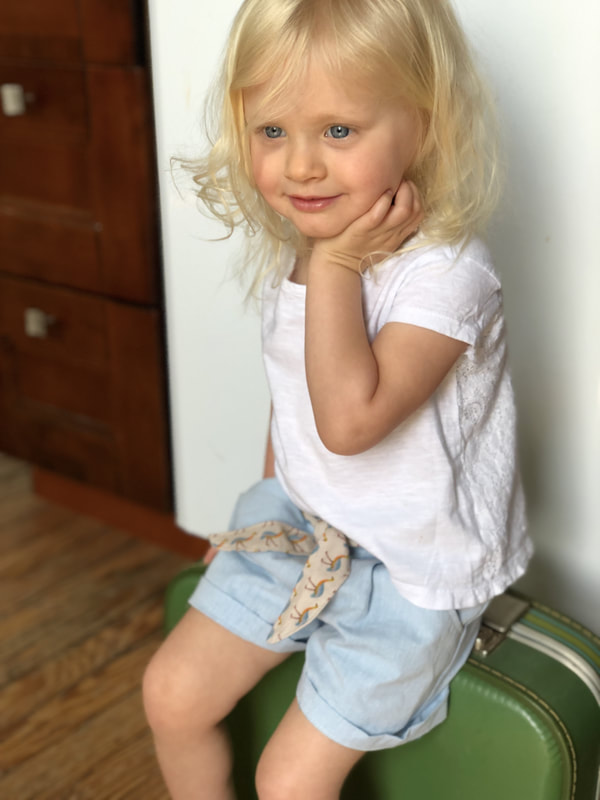
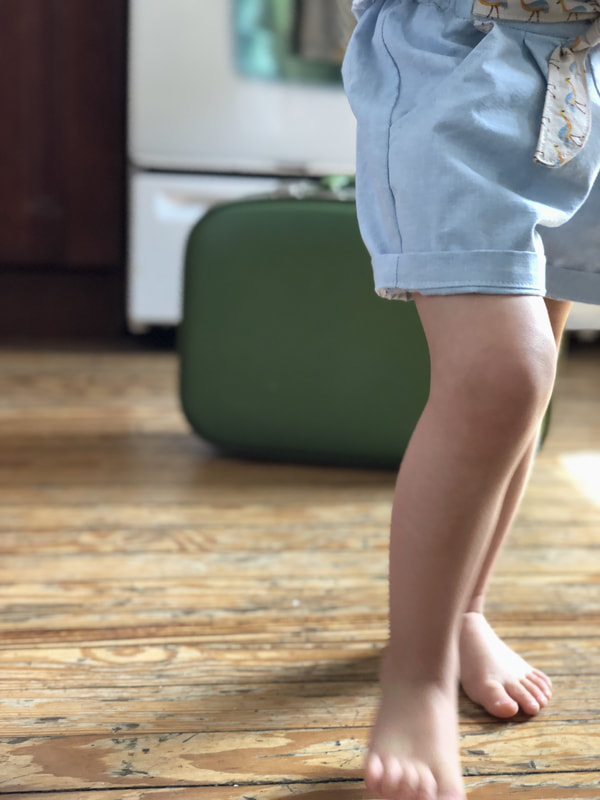
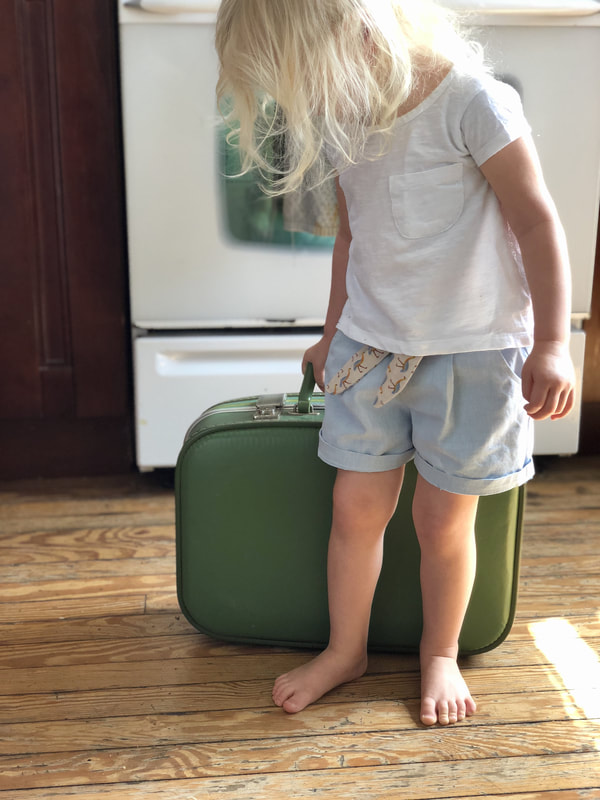
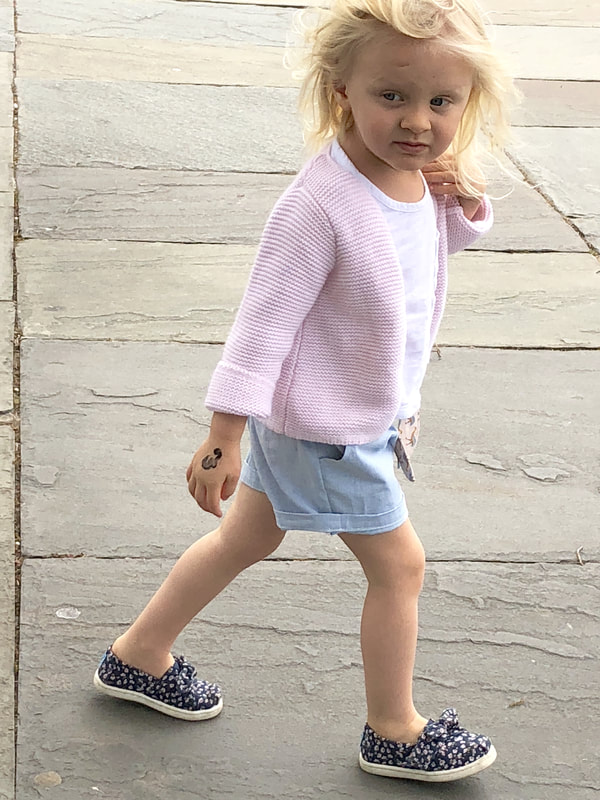
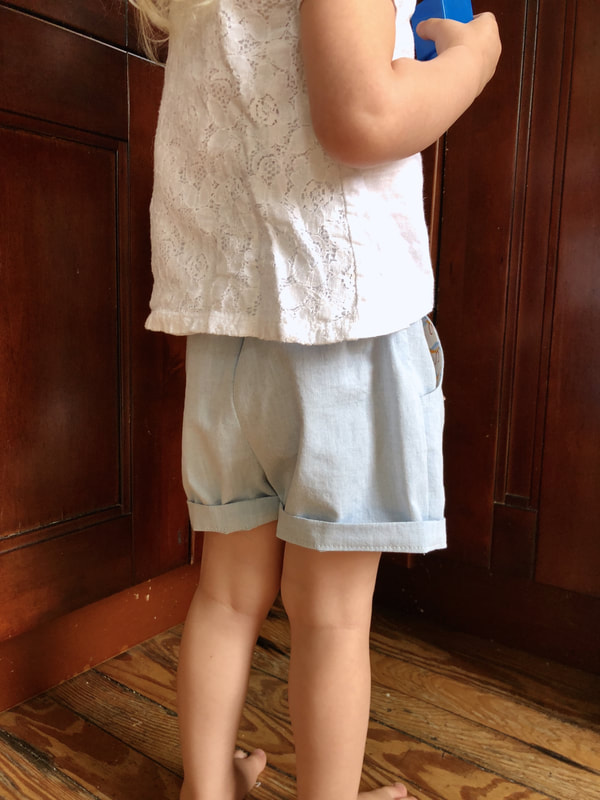
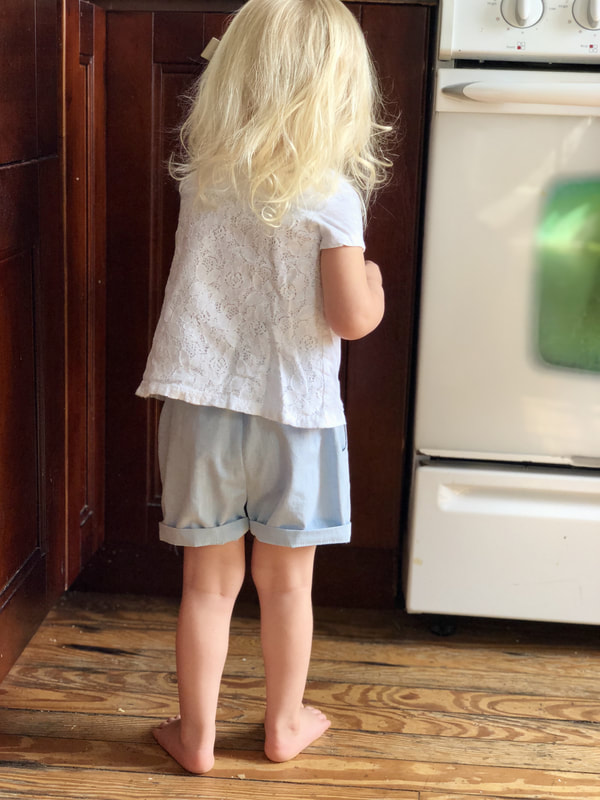
We have a new favorite in our house—these adorable shorts by Toya Walker. The Graphite Trousers and Shorts pattern dropped yesterday and it has been a hit around here! It seems we’re not the only ones as there were rave reviews all around the tester group with many people making several versions. Not only is it a great stash buster (even for the larger sizes and full trousers version you’re only looking at about 2 yards of fabric—the shorts version I made only called for 3/4yd), but the very clear instructions and illustrations make this pattern an absolute breeze to sew up.
My little lady is tall and skinny (36in tall with 16in waist) and I certainly have difficulty finding RTW clothing that fits her just right. This pattern was spot on. Per Toya’s measurement chart and suggestions to focus on hip measurement, I stuck with the size 2. The elasticized waist makes this garment totally customizable and the pattern is complete with a wonderful chart to help figure out the best length of elastic for your child’s waist. The method of elastic insertion was also one of the easiest methods I have ever used.
I opted for the shorts version and used a light blue chambray (light-med weight, cotton) from my leftovers stash (yay for #makeyourstash). I made no modifications to length and I feel it hits just right. I do like the look of a cuffed hem on shorts, so I did turn these up once, but even without the turn up, I felt the length was good.
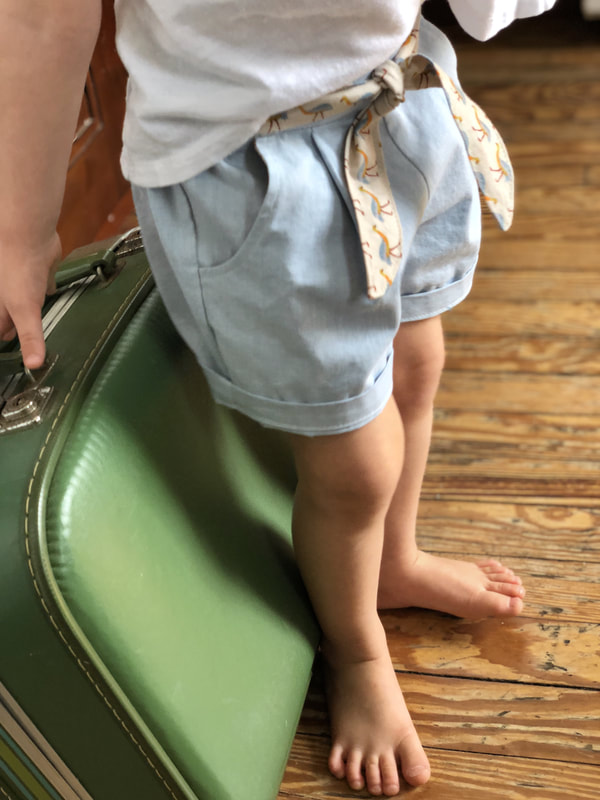
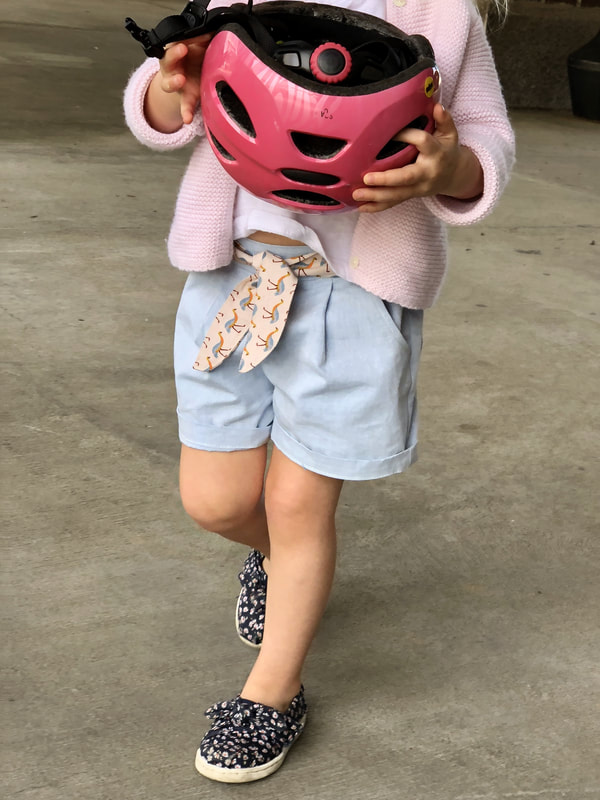
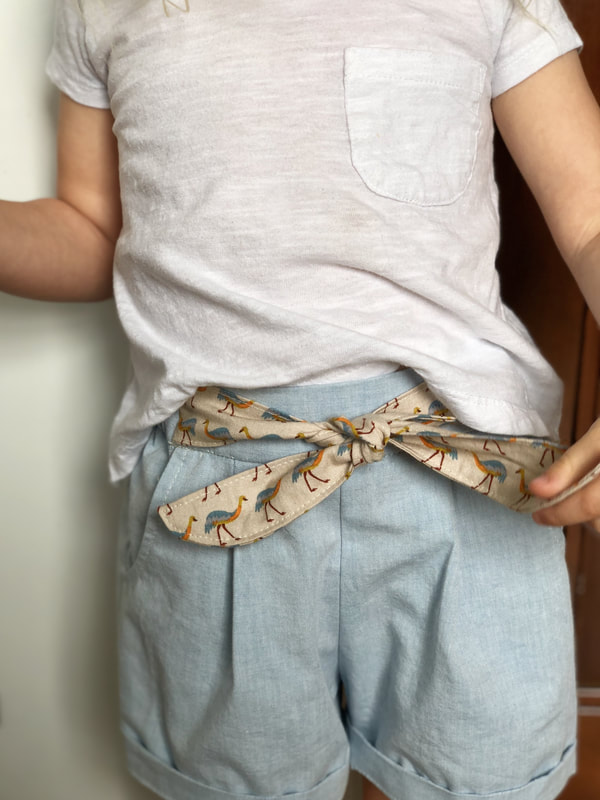
I wanted to add a little special detail to her pockets, so they are lined with a sweet bird fabric I had reserved for another project, but I think it was the right choice to share. I also used the bird fabric for the ties. The pleated detail to the front really gives the shorts a polished look and the ties keep it a bit whimsical.
While I’m gearing up for warmer weather with this make, this is truly an all season pattern as it includes options for cropped and full length pants, both with options of an elastic or regular hem. Seeing the other tester’s makes has made me realize the Graphite’s will look amazing in a variety of weights and textures of fabric (one person was even brave enough to sew a knit version). I will eventually be making every version because I LOVE this pattern (so much so that I wish there was also an adult version). #TheGraphiteTrousers 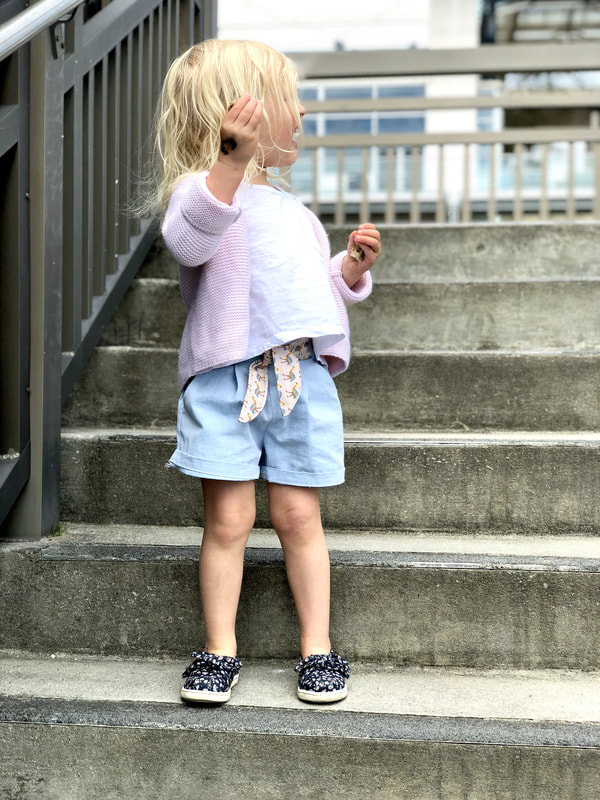
 Hey! You're getting pretty damn good at this sewing thing. Thought maybe you would want to share it with the world a little bit with a little "virtual portfolio."
You can write about things here. Sewing things, photo things, travel things (remember travel things?), whatever you want. I can help you run the site. You just keep being creative and doing your thing. Merry Christmas and I love you, Kyle J. Noyed Creations IT Department |
AuthorJen. Archives
February 2020
Categories |

 RSS Feed
