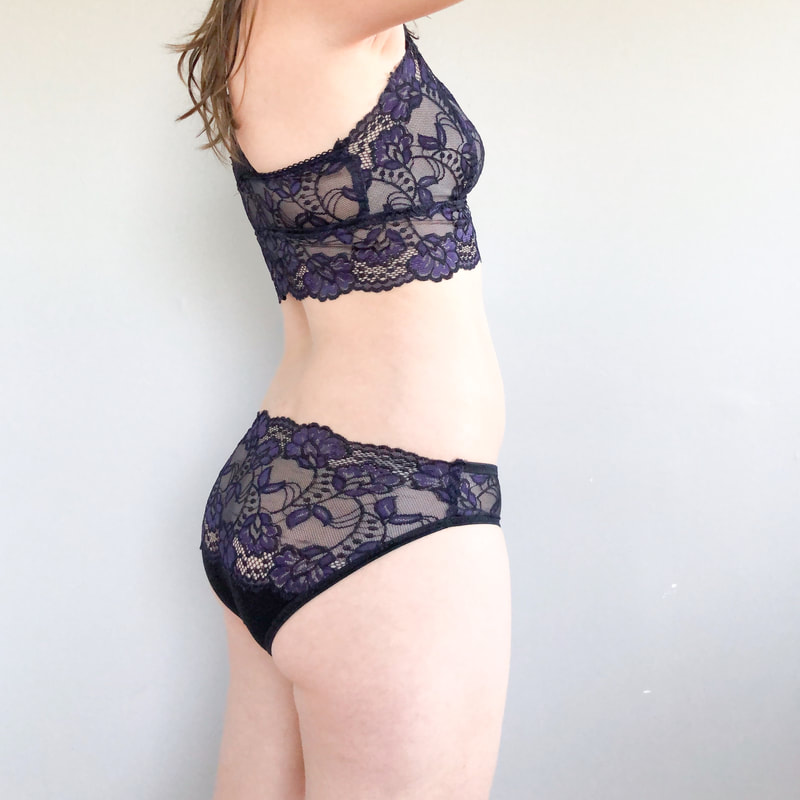
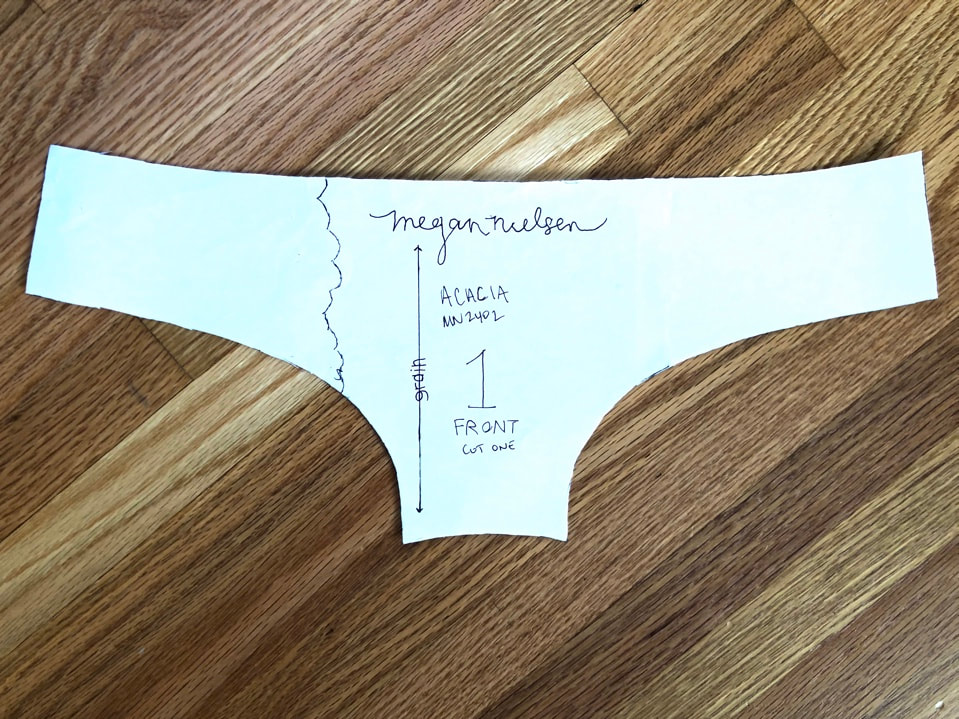
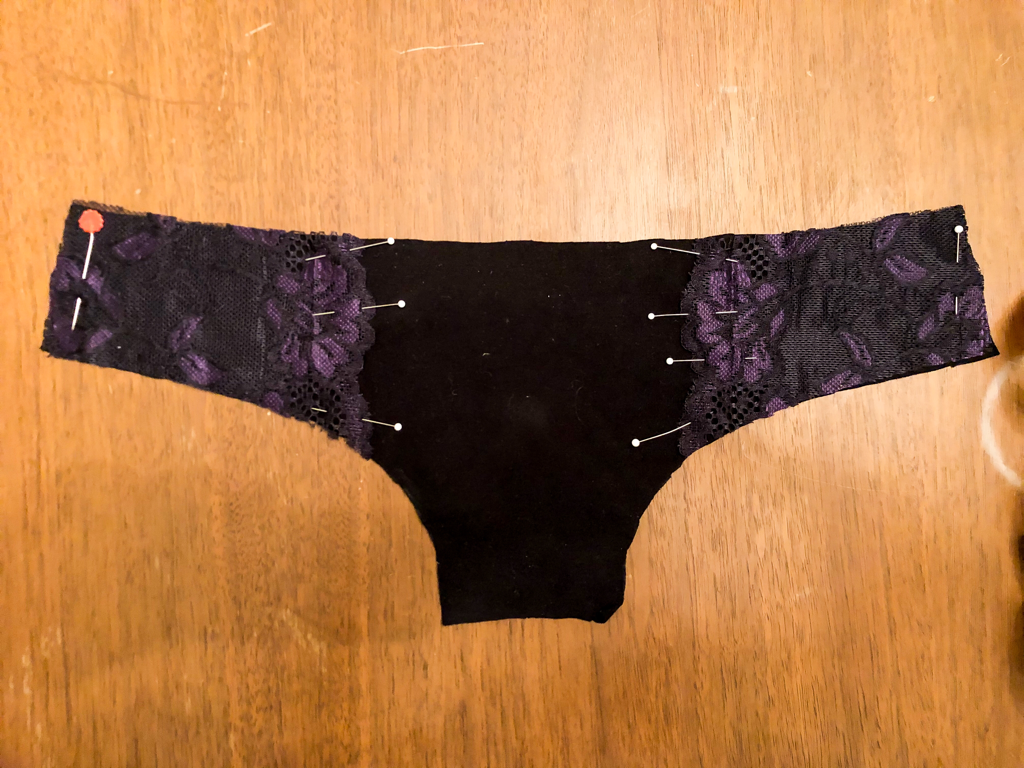
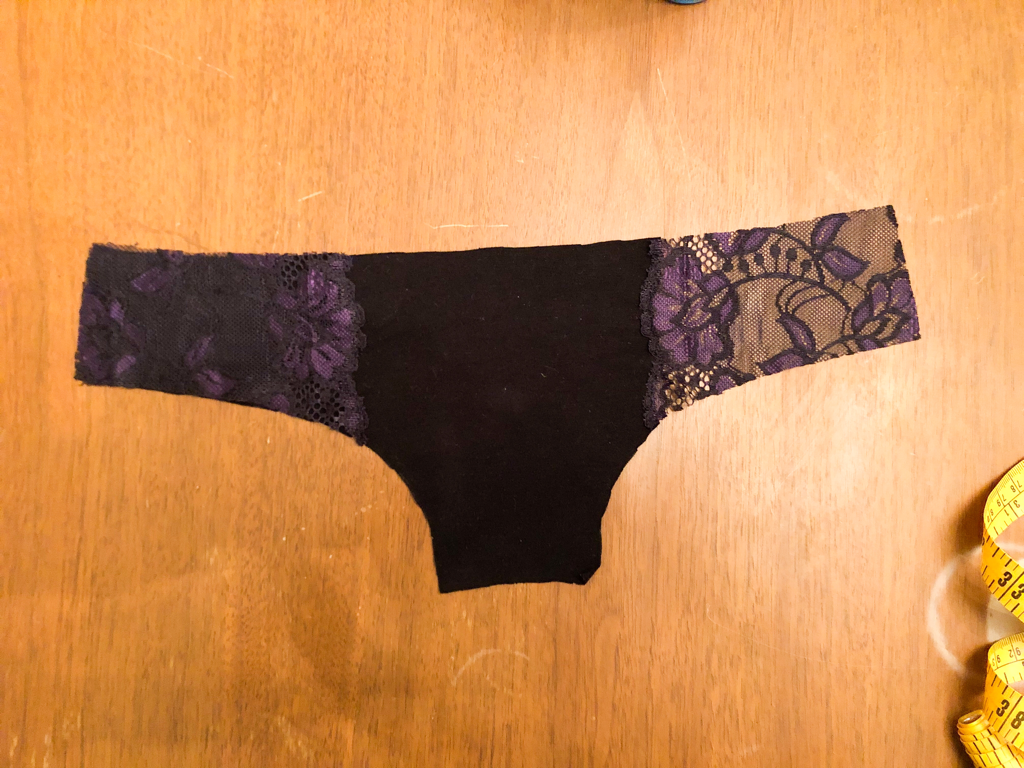
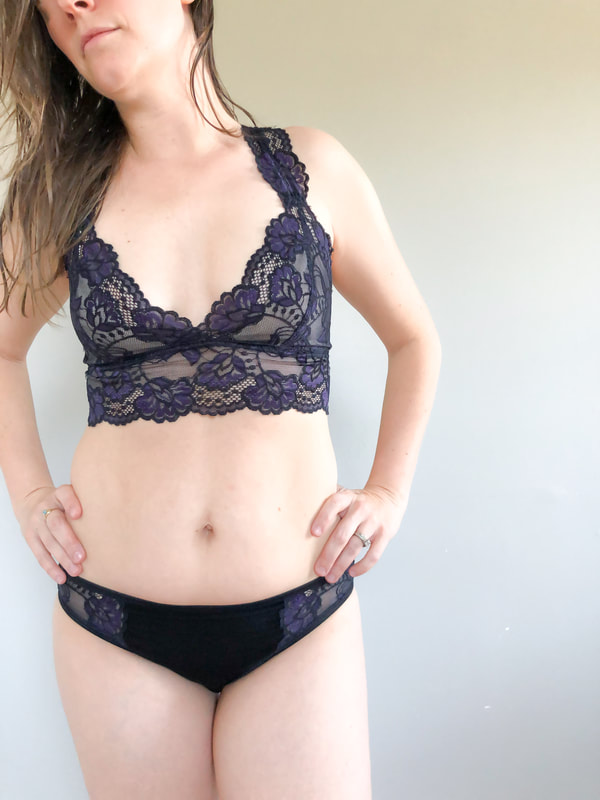
 For any of you participating in the #braaweekchallenge, I imagine hacking and modifying existing patterns may eventually find its way into your plans--it certainly didn't take long to sneak its way into mine. The Megan Nielsen Acacia underwear are fast becoming some of my favorites, not only to wear, but also to sew. The pattern is free if you sign up for Megan's newsletter and it is a quick simple sew. Great for beginners (and a dynamite scrap buster), this super practical pattern is such a fantastic base for customization. I have wanted to make a (comfortable) matching lingerie set for a long time and I realized that these undies would be the perfect companion to the Mama Bridgette from Made for Mermaids that I sewed up earlier this week. The lace I had used on the bralette had a beautiful scalloped edge that I really wanted to showcase, so I got to work figuring out how to modify the pattern to accommodate the lace. I've included the steps I took and a few photos and videos for illustration below (please forgive the quality of these images/videos--I haven't figured out a workable solution for filming while sewing just yet). The first step I took was to lay the lace across the back pattern piece to determine placement as well as how much additional fabric would be needed. The lace that I am using is a 6 inch stretch lace I purchased on clearance from Bra Maker's Supply last spring. I really wish that I had been most focused on making the pattern lay symmetrically, however, my main focus during this late night endeavor was making sure the lace started at the lowest point possible where the side seams would join. As you can see below, I was only able to accomplish this on one side and I think I would have achieved even better results if I had just chosen the symmetrical route. 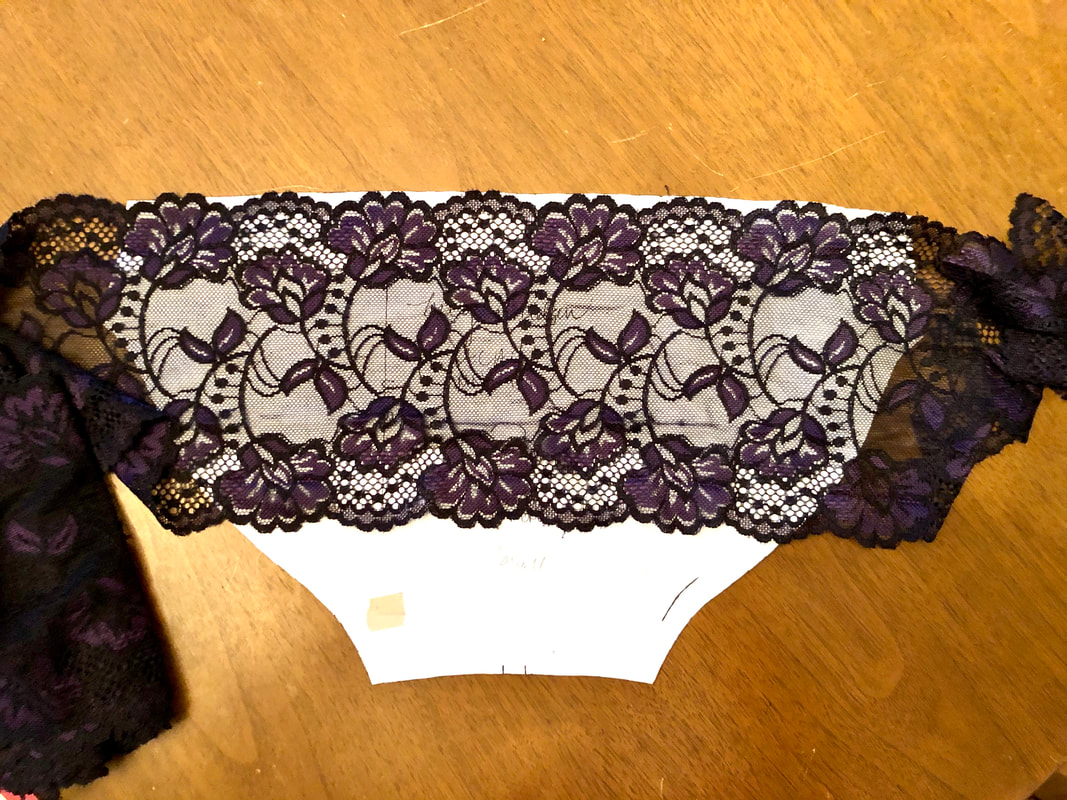 After deciding on lace placement, I pulled out my scrap fabric. This is an ahhhhhh-maaaazingly soft and luxurious bamboo rayon purchased from Stone Mountain & Daughter Fabrics and I plan to use every. last. bit. of it. I positioned the black fabric below the lace, aligned per correct grainline, and pinned everything together. Then I placed the pattern piece on top and cut it out. 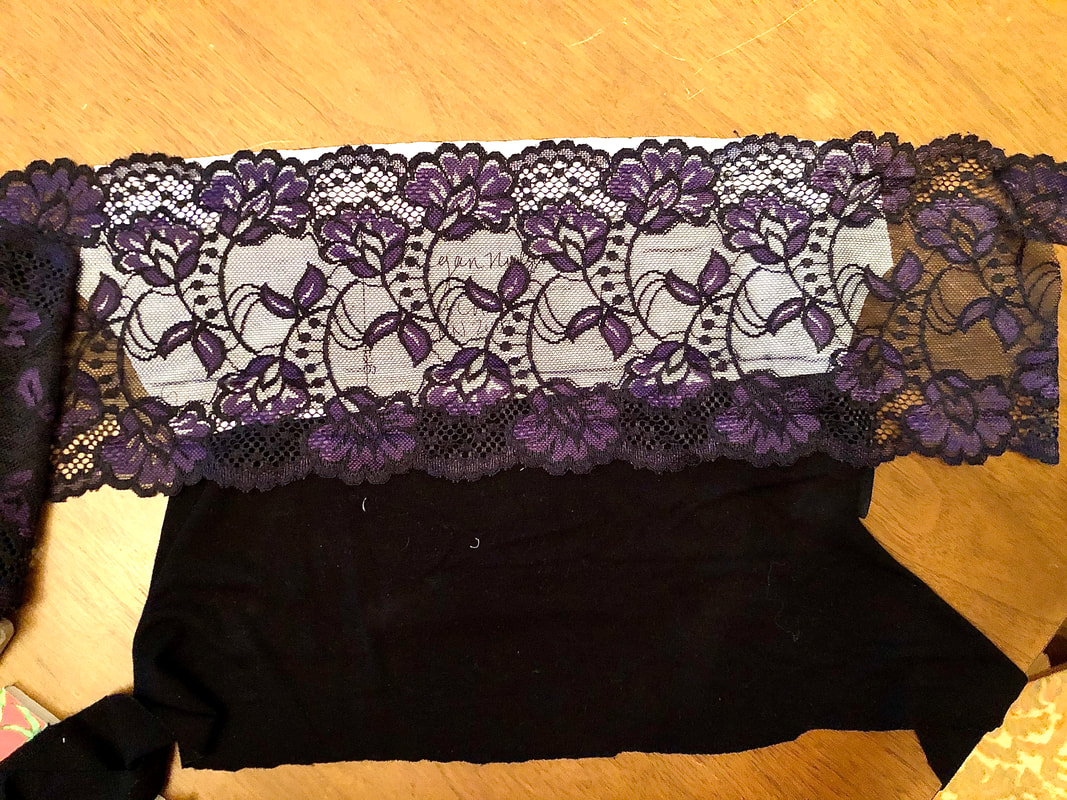 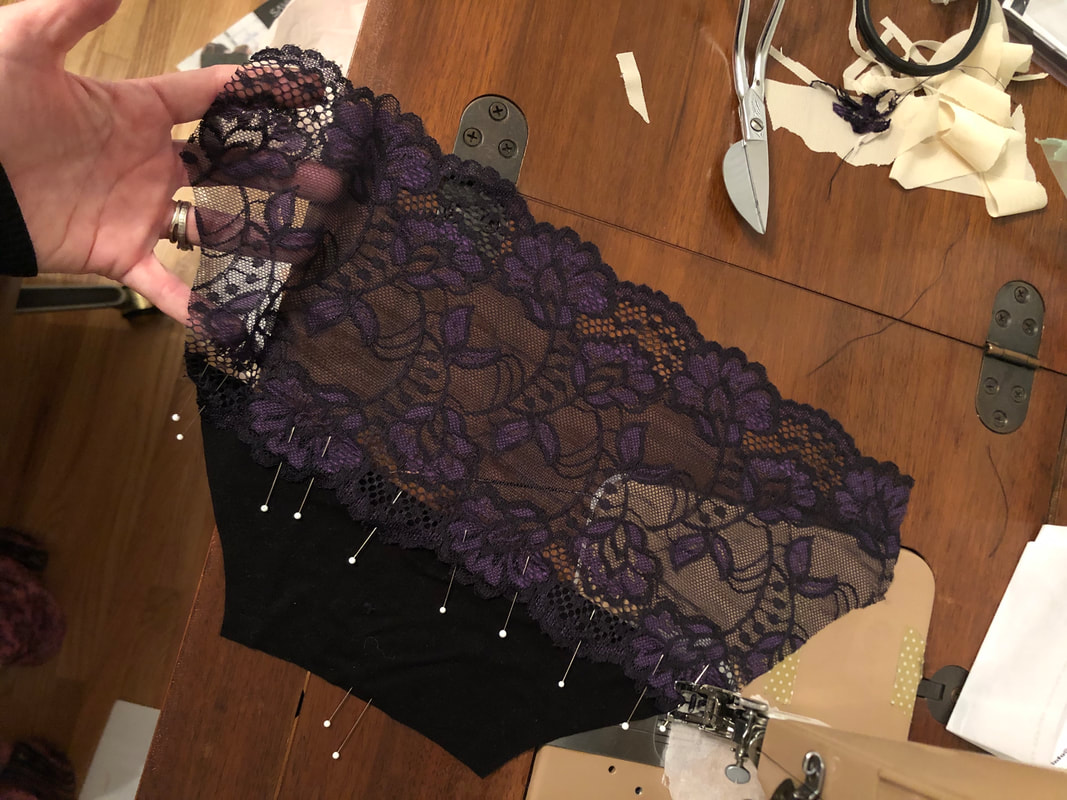 Next, I prepped the front of the underwear. For the rise specific to these underwear, I didn't want the scalloped edge to be at the top of the front waistline, instead, I opted to showcase the scalloped edge vertically and toward the middle of the underwear. I had previously cut a black front panel for this pattern (during one of my use-all-the-scraps cutting frenzies), so I just figured out how I wanted the lace positioned. I made sure the image in the lace was mirrored on each side and laid it on top of the previously cut piece. I pinned the lace in place and took everything to my sewing machine.
I stitched around the scallops of the lace with a zigzag stitch being careful not to stretch the fabric underneath. After the lace was attached I cut the black fabric, right next to the stitching line and followed along the scallop. This fabric was removed. I then had the back panel and a couple of lacy cut outs on the front. (Disclaimer: I'm not adept in holding a phone that is recording my sewing while sewing, your sewing will probably go much more quickly than depicted in the video below.) 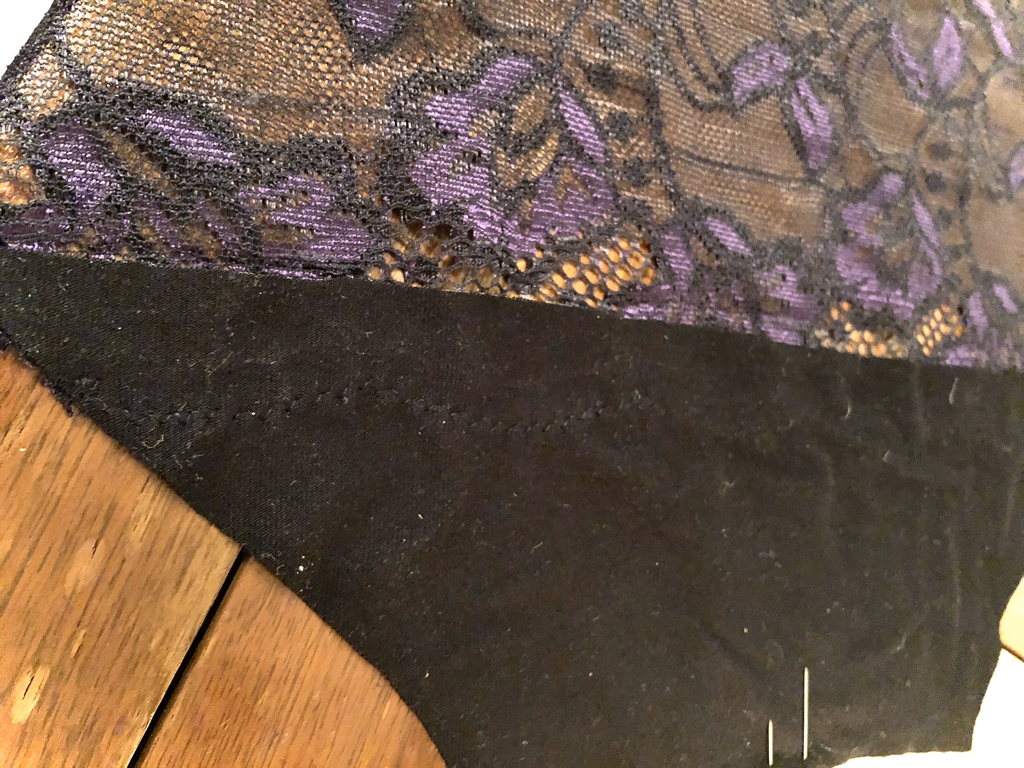 Lace stitched to back panel prior to removing excess black fabric.
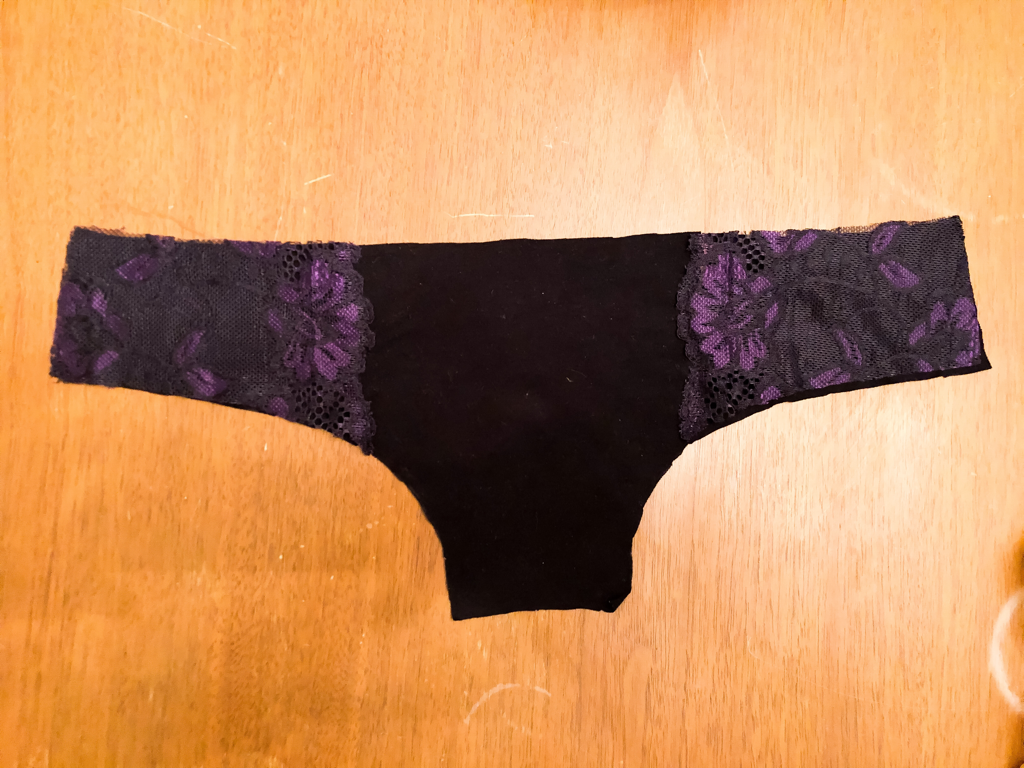
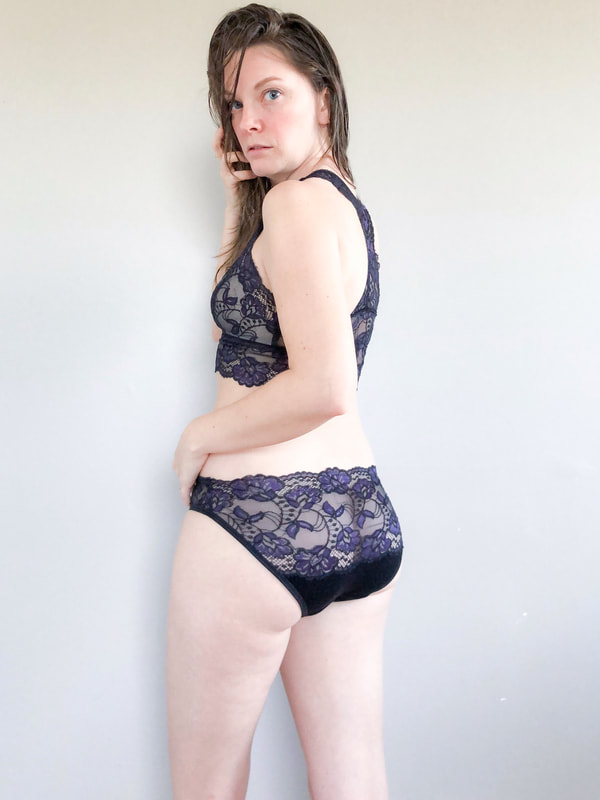
Because I wanted to use the scalloped edge on the back panel, I ran into an elastic conundrum. What could I do to make this work while also showcasing the pretty lace edge? I pinned the seam allowances and tried the panties on to assess fit with no elastic; they actually fit pretty well. Of course, the raw edge on the front panel would need to be finished. Using any type of elastic that required sewing to one side and then flipping to the other side and topstitching (flat elastic or picot) would result in a mismatch at the side seams since I wouldn’t be using the same elastic allowance on the back. The only elastic option that would work with the modifications I made was fold over elastic (FOE). I didn’t want the elastic to be super noticeable and luckily I had 5/8” FOE hiding in my stash (supposed to be reserved for a Seamwork bodysuit that I’ve been meaning to make for 2 years...). I applied the FOE to the front panel prior to sewing up the side seams. I just guessed on the length. I probably made the elastic about 1 to 1.5 inches shorter than the top of the panel. I then quartered my elastic and the front panel and applied. 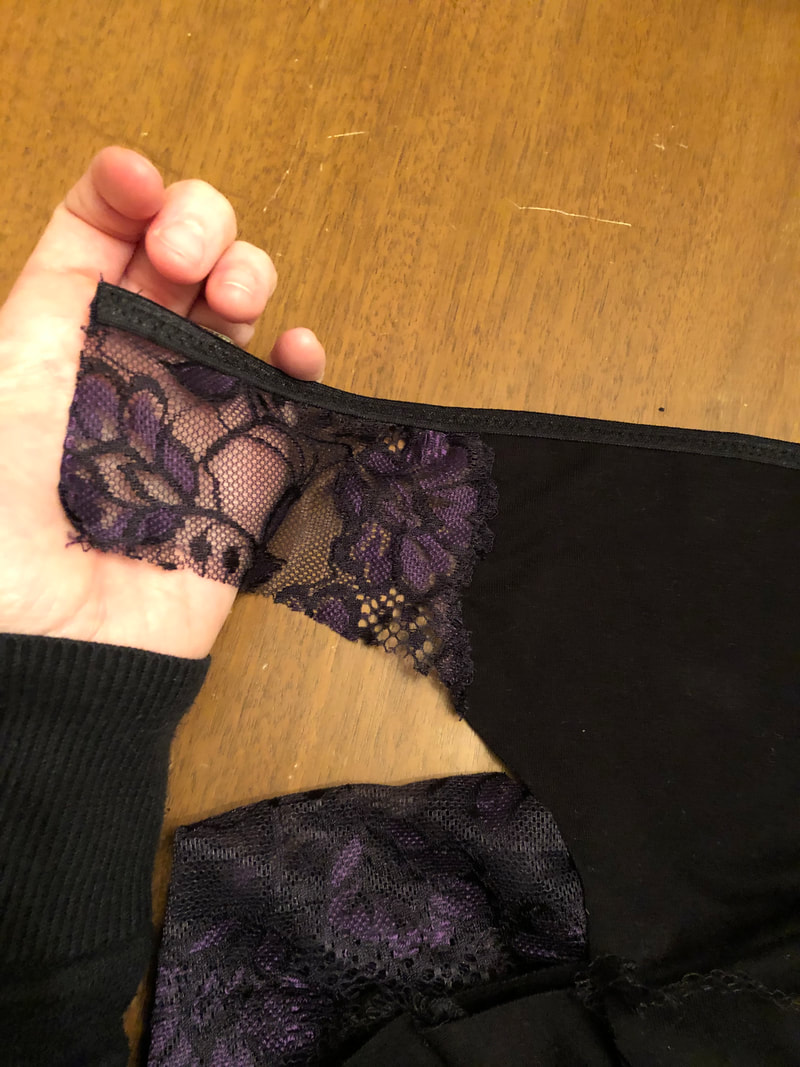 Afterwards, I stitched up the side seams with a zigzag stitch (I felt serging would be too bulky on the delicate lace) and then topstitched the seam allowances to the back. I followed the pattern instructions for applying the FOE to the legs. The fit ended up being fantastic! My one regret is that I wasn’t able to center the pattern of the lace perfectly on the back panel. Otherwise, this is probably my favorite pair of me-made undies to date.
0 Comments
|

 RSS Feed
